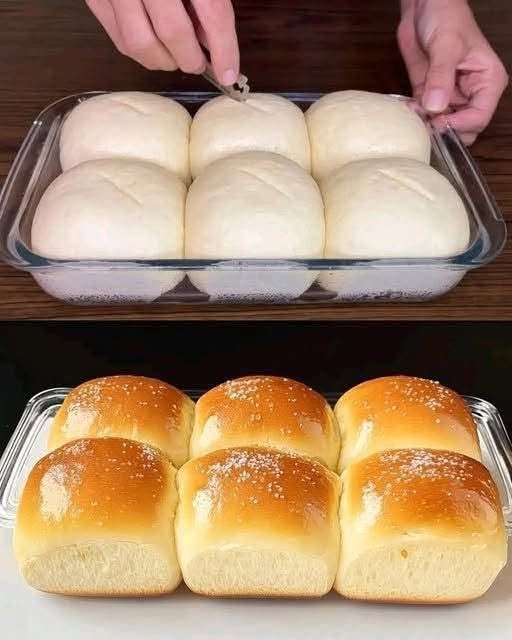
Traditional milk bread—famous for its pillow-soft, feather-light texture—usually relies on sugar not just for sweetness, but to feed the yeast and tenderize the gluten strands. When adapting this style for a diabetic-friendly or blood-sugar-conscious lifestyle, the key is replacing refined sugars with a zero-calorie, blood-sugar-neutral sweetener (like allulose or erythritol) while keeping the dairy fat and hydration that give milk bread its signature melt-in-your-mouth crumb.
Here is a recipe for a Soft, Sugar-Free Vanilla Milk Bread that delivers the classic fluffy texture without spiking blood glucose.
Ingredients
The Dough:
-
Bread Flour or High-Protein All-Purpose Flour: 3 cups (approx. 360g) — Note: Bread flour helps build the strong gluten network needed for that classic pull-apart softness.
-
Zero-Calorie Granulated Sweetener: 3 tablespoons (such as erythritol, allulose, or a monk fruit blend). Allulose is especially great here because it caramelizes and retains moisture similarly to real sugar.
-
Instant Yeast: 2 teaspoons (1 standard packet)
-
Salt: 1 teaspoon
-
Warm Milk (Whole or 2%): 3/4 cup (lukewarm, around 110°F)
-
Vanilla Extract: 1 tablespoon (for a rich, aromatic vanilla profile)
-
Egg: 1 large (room temperature)
-
Unsalted Butter: 4 tablespoons (melted, but not hot)
The Wash (Optional for a golden crust):
-
1 small egg beaten with 1 tablespoon of milk or water
Step-by-Step Instructions
1. Activate the Yeast & Vanilla Base
-
In a measuring cup, combine your warm milk, vanilla extract, and 1 tablespoon of your zero-calorie sweetener (taken from your total amount).
-
Sprinkle the instant yeast over the top, stir gently, and let it sit for 5 to 10 minutes until it becomes frothy. This proves your yeast is active.
2. Combine the Dry Ingredients
-
In a large mixing bowl (or the bowl of a stand mixer), whisk together the flour, the remaining zero-calorie sweetener, and the salt.
3. Mix and Knead the Dough
-
Pour the frothy yeast-milk mixture, the egg, and the melted butter into the dry ingredients.
-
Mix with a wooden spoon or a dough hook attachment on your mixer until a shaggy dough forms.
-
Knead thoroughly: Knead by hand for about 10–12 minutes (or in a stand mixer for 7–8 minutes) until the dough becomes smooth, elastic, and slightly tacky, but not sticky. Tip: Thorough kneading is what gives milk bread its signature long, soft strands.
4. First Rise
-
Form the dough into a smooth ball and place it in a lightly oiled bowl. Cover it with a damp towel or plastic wrap.
-
Let it rise in a warm, draft-free spot for 1.5 to 2 hours, or until it has doubled in size.
5. Shape the Loaf
-
Punch down the risen dough to release the air, and turn it out onto a lightly floured surface.
-
Divide the dough into 3 or 4 equal pieces. Roll each piece into a smooth ball, let them rest for 10 minutes, then roll them flat and roll them up tightly like logs. Place them side-by-side into a greased 8×4-inch loaf pan.
6. Second Rise
-
Cover the loaf pan and let the dough rise a second time for 45 to 60 minutes, or until the dough fills the pan and crowns nicely over the edges.
7. Bake
-
Preheat your oven to 350°F (175°C).
-
Gently brush the top of the loaf with your egg-and-milk wash for a golden, shiny finish.
-
Bake for 25 to 30 minutes. (If the top starts browning too quickly around the 15-minute mark, loosely tent a piece of aluminum foil over it).
-
Remove from the oven, turn the loaf out onto a wire rack, and let it cool completely before slicing.
Nutritional & Blood Sugar Tips
-
Carbohydrate Awareness: Even without sugar, this bread contains flour, which breaks down into glucose. Pairing a slice with a source of protein or healthy fat (like avocado, eggs, or natural peanut butter) helps slow down carbohydrate absorption and minimizes post-meal blood sugar spikes.
-
Storage: Because it contains no artificial preservatives, store it in an airtight container at room temperature for up to 3 days, or slice and freeze it for easy toast-ready portions later.
Are you baking for someone managing diabetes, or exploring other low-glycemic baking swaps?